Neuroanatomy questions are among the most feared on Step 1, but they’re also among the most predictable. The NBME repeatedly tests classic lesions—each with a reproducible pattern of motor, sensory, and cranial nerve findings. Success depends less on memorization and more on pattern decoding. By training your brain to spot combinations of deficits, you can localize in under 10 seconds. MDSteps’ Adaptive QBank is specifically tuned for this, tagging each neuro question by tract and region so your analytics dashboard reveals your weakest circuits. The goal is to make localization automatic. For example, if you read “contralateral body weakness with ipsilateral cranial nerve palsy,” your mind should immediately jump to a brainstem lesion. Once you’ve mastered that reflexive translation, you’ve solved half the battle on Step 1 neuroanatomy. These twelve lesions are canonical because they embody distinct localization patterns and lend themselves to exam-style vignettes. You’ll encounter them not only in question banks but across NBME practice forms. Knowing these 12 lets you cover over 80% of the neuroanatomy lesions tested on the exam. MDSteps’ Study Planner can auto-generate spaced drills based on these syndromes. Localization begins with recognizing crossed findings—ipsilateral cranial nerve palsy with contralateral motor or sensory loss indicates a brainstem lesion. Next, identify which cranial nerve is involved to determine the level: CN III → midbrain, CN VI → pons, CN XII → medulla. Finally, integrate vascular clues (PICA, AICA, basilar) and tract patterns (corticospinal vs spinothalamic). Using MDSteps’ QBank, filter by “Neuro Localization” mode to train this reasoning sequence repeatedly under exam timing. The platform’s automatic flashcard export lets you convert every missed lesion question into a recall prompt for Anki or MDSteps decks—cementing the pathway pattern. Turn this concept into NBME-style question practice with signal-first explanations, why-wrong logic, and weak-pattern review. Some syndromes appear deceptively similar, leading to exam-day confusion. For example, Weber and Benedikt both involve CN III palsy, but Weber adds hemiparesis (peduncle), while Benedikt adds tremor (red nucleus). Lateral pontine and medullary lesions both affect facial and vestibular function, yet the presence of dysphagia and hoarseness points to medulla (Wallenberg). Recognizing which tracts cross where clarifies these overlaps. Creating side-by-side comparison cards or using MDSteps’ “compare lesions” interactive feature helps reinforce subtle distinctions rapidly before the exam. Visualization converts complexity into retention. Picture every lesion as a cross-section slice: draw the tracts, then color-code the affected region. Over time, this creates a visual library—your own “mental MRI.” MDSteps’ visual analytics engine renders similar lesion overlays in its neuro QBank, helping learners see which tracts are hit in each question stem. Even without fancy tools, sketching a five-minute lesion map daily consolidates both anatomy and function. Students who engage with this kinesthetic technique often improve neuro QBank accuracy by 20–30% within a month. When you spot a pitfall in your MDSteps analytics dashboard, target that lesion group specifically using adaptive review mode—it automatically reshuffles related question types until mastery is reached. Efficient neuro review means spacing out exposure, not cramming diagrams. Here’s a sample 7-day micro-cycle used by top scorers: This rhythm aligns neuroanatomy with the forgetting curve—reviewing lesions at day 1, 3, and 6 intervals optimizes long-term recall. Before your exam, run through this list daily until it feels instinctive. MDSteps’ timed rapid-review mode drills these 12 lesions in randomized format so your pattern recognition stays sharp under pressure. On test day, localization questions are your chance to score quickly. When you see a neuro stem, don’t read line by line—jump straight to pattern parsing: laterality → cranial nerve → tract → vascular clue. Once localized, eliminate answers anatomically inconsistent with your site. MDSteps learners who adopt this reflexive approach consistently outperform peers on NBME-style neuro blocks. By mastering the 12 archetypal lesions and drilling them via adaptive review, you transform one of Step 1’s most intimidating subjects into free points. Neuroanatomy rewards those who think in maps, not memorized lists—and with MDSteps’ integrated visual tools, those maps come alive. References:Why Neuroanatomy Localization Still Rules Step 1
The Core 12 Lesions Every Step 1 Taker Must Know
Lesion Key Findings Localization Clue Weber Syndrome Ipsilateral CN III palsy, contralateral hemiparesis Midbrain, cerebral peduncle Benedikt Syndrome CN III palsy + contralateral tremor/ataxia Midbrain tegmentum Claude Syndrome CN III palsy + contralateral ataxia (red nucleus) Midbrain Medial Pontine Syndrome CN VI palsy, contralateral hemiparesis Pons (paramedian) Lateral Pontine Syndrome Facial weakness, hearing loss, ataxia AICA territory Medial Medullary Syndrome Tongue deviation, contralateral weakness Anterior spinal artery Lateral Medullary (Wallenberg) Dysphagia, hoarseness, ataxia, contralateral pain/temp loss PICA Brown-Séquard Ipsilateral weakness & vibration loss; contralateral pain loss Spinal hemisection Anterior Spinal Artery Syndrome Bilateral motor & pain/temp loss Spinal cord anterior 2/3 Subthalamic Nucleus Lesion Contralateral hemiballismus Basal ganglia MCA Stroke Face/arm weakness > leg, aphasia or neglect Lateral cortex PCA Stroke Contralateral homonymous hemianopia with macular sparing Occipital lobe Step 1 Localization Algorithm: Think Crossed Findings
Practice this topic the way USMLE tests it
Reading the topic is only step one.
See how it works
Distinguishing Look-Alike Lesions
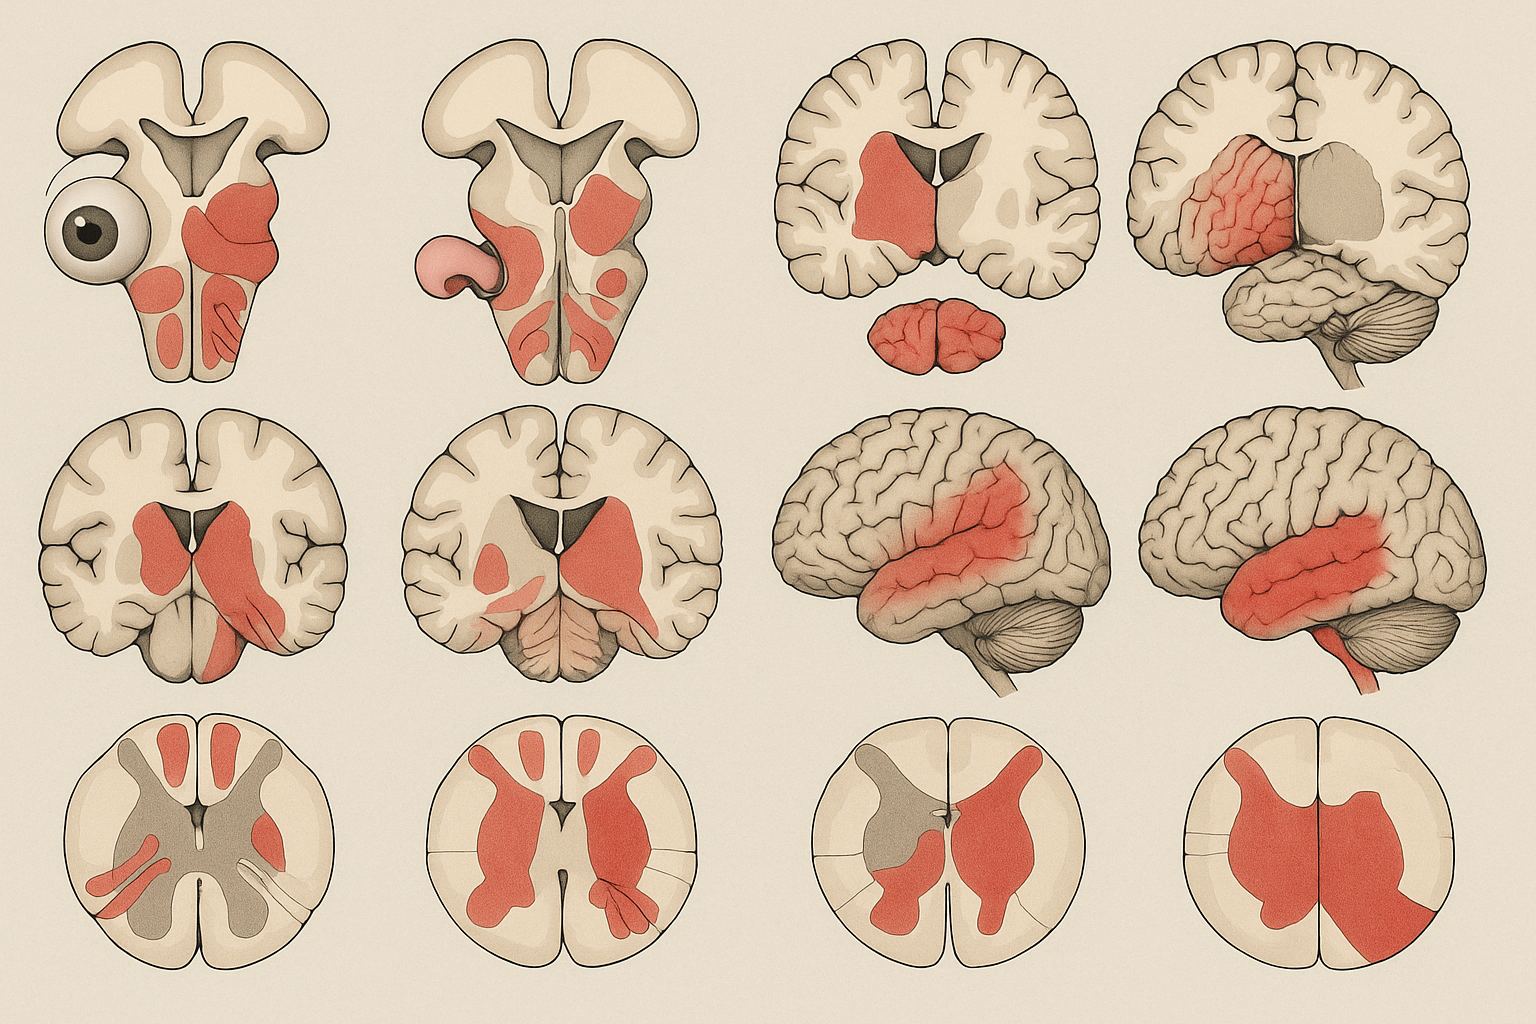
Visual Mapping: Turning Anatomy Into Patterns
Common Pitfalls in Neuro Localization
Building a High-Yield Neuro Study Schedule
Day Focus MDSteps Tool 1 Midbrain & CN III syndromes Adaptive QBank (Weber, Benedikt) 2 Pons lesions Flashcard deck export 3 Medulla & spinal tracts Study Planner timed drill 4 Vascular territories review Analytics dashboard heat map 5 Mock block (40Qs) QBank exam mode 6 Rapid recall & error review Auto-generated flashcards 7 Rest + visual lesion mapping Manual sketch or MDSteps overlay Rapid-Review Checklist: The Localization Reflex
Putting It All Together on Exam Day
• Blumenfeld H. Neuroanatomy Through Clinical Cases. 3rd ed. Sinauer; 2022.
• Purves D, et al. Neuroscience. 6th ed. Oxford University Press; 2018.
• NBME® Comprehensive Basic Science Exams (2023–2025 updates).
• MDSteps Learning Analytics Data (2025 internal summary).
USMLE Step 1
Neuroanatomy for Step 1: The 12 Lesions You Must Localize
MDSteps Insight: Step 1 loves neuroanatomy stems that hinge on lesion localization. These questions reward those who can translate symptoms into anatomy in seconds—not memorize every tract. This guide distills the 12 high-yield lesions that show up again and again.
Full access: $27/mo
Lifetime: $299
Topic-targeted blocksSignal-first explanationsWhy-wrong review
Monthly access. Cancel anytime. No free trial required.
Topic practice