Why “First-Pass” Verification Matters—and How to Engineer It
For international medical graduates (IMGs), Intealth (which includes ECFMG/FAIMER) is the gatekeeper that confirms your identity and primary-source medical credentials. A first-pass verification keeps your USMLE eligibility window intact, preserves preferred Prometric test dates, and avoids costly re-shipping and re-translation cycles. Conversely, a single document mismatch—an accent in your name, a registrar signature format that your school changed last year, a missing seal on a diploma copy—can trigger a back-and-forth that cascades into weeks of delay. This article distills the highest-yield document moves to prevent those stalls. Think of it as your preflight checklist before any portal click, courier drop-off, or registrar email.
We’ll focus on three control points you own: identity coherence (all identifiers matching across all systems), document integrity (properly issued, sealed, translated, and legible), and submission mechanics (file naming, metadata, request routing, and school-side responsiveness). You also need realistic buffers. Even well-run schools batch verifications; holidays, exam blocks, and turnover affect registrar throughput. Build a timeline that backs up from your ideal exam month and includes contingency routes (e.g., notarized or certified copies when permitted, proactively prepared translation packets, and signed letters for name changes).
Throughout this guide, you’ll see tactics that reduce variance: front-load identity alignment, standardize file conventions, and script registrar outreach. We’ll also provide a compact matrix of frequent “near-miss” errors and the corrective step for each. If you implement these controls before you submit anything, you materially increase the odds that your first response from Intealth is approval—not a request for clarification. The result is boring but beautiful: your permit releases on time, your Q-bank cadence doesn’t wobble, and you sit for Step 1/Step 2 CK/Step 3 when your peak performance window is open.
First-Pass Wins
- Permit releases inside your planned eligibility window.
- No unplanned courier/translation spend.
- Registrar relationship stays cordial—faster future requests.
- Stable study schedule; no last-minute rescheduling fees.
Failure Modes
- Name/date mismatches across passport and diploma.
- Unacceptable copies (no seal/signature) or illegible scans.
- Uncertified translations or translator not qualified.
- Registrar delays; unclear request instructions or wrong office.
Identity Coherence: Names, Dates, and “Micro-Mismatch” Prevention
Identity coherence is the most preventable cause of delay. Your legal name, date of birth, and gender marker must match exactly across your passport, national ID where applicable, degree/diploma, transcripts, prior certificates, and every entry in your MyIntealth profile. That means handling diacritics, hyphenations, multiple surnames, transliteration differences, patronymics, and post-marriage name updates before any credential request is sent. If your passport uses “José María Álvarez-García” but your diploma prints “Jose M Alvarez Garcia,” you must either standardize to the legal rendering or include compliant documentation that formally links both versions.
Build a one-page Identity Map listing: (1) legal name as shown on current passport, (2) every historical name variant with the source document, (3) official proofs that bridge variants (e.g., marriage certificate, court order, government name change record), and (4) the exact text you will use in all submissions. Store redacted PDFs of proofs to share only when requested. If your country uses non-Latin scripts, prepare a transliteration statement that mirrors your passport’s machine-readable line; avoid freelancing your own English spellings.
Dates create hidden traps. Some countries print day–month–year; others month–day–year. Align to the standard expected in the portal, and if a diploma or transcript uses text dates (e.g., “15 September 2021”), keep that exact form in any explanatory note. Finally, confirm that every scanned document shows your identifiers with pixel-level clarity—no compression artifacts or cropped edges. A 300–600 dpi grayscale PDF with embedded text (OCR) is ideal and reduces follow-up questions from staff who need to read small registry details.
| Identifier | Common Mismatch | Preventive Fix | Proof You May Need |
|---|---|---|---|
| Legal name | Missing accent, hyphen, or sequence of surnames | Mirror passport exactly in portal and forms | Passport bio page; marriage/court order if changed |
| Transliteration | Cyrillic/Arabic/Chinese name rendered inconsistently | Adopt passport transliteration; note prior variants | Official transliteration page; national ID |
| Date of birth | DD/MM/YYYY vs. MM/DD/YYYY swap | Use text month or verify portal format; double-check | Passport; birth certificate (if requested) |
| Signature | Old vs. new signature visible on forms | Use current legal signature consistently | ID renewal record (rarely requested) |
Primary-Source Documents: Diplomas, Transcripts, MSPE, and School Seals
Intealth’s core requirement is that your medical education credentials are validated by the issuing institution (primary source). That means the final diploma/degree certificate and official transcripts must originate from the medical school (or its designated registrar’s office), often with specific seals, signatures, and formats. Avoid sending “nice scans” you made yourself unless expressly allowed; the safest baseline is that the school sends the official version through an approved channel or responds to verification requests directly. If your school has transitioned registrars, confirm which office currently holds archives and who signs graduate verifications.
Before any request goes out, gather specifications: (1) acceptable document type (original vs. attested copy vs. electronic official), (2) signature authority (Dean, Registrar, Records Officer), (3) required seal/emboss, (4) envelope/courier rules if physical, and (5) electronic transmission pathways (official school email domain, secure portal). Pre-brief the registrar with a one-page instruction sheet (your identifiers, destination, file naming, and deadline). Where schools batch work, ask for the next batch date so you can align submission with your USMLE window.
Graduation date accuracy matters. Some schools list the last exam date; others list the senate conferral date; still others print the date the diploma was issued. Use whatever appears on the official document and avoid “corrections” that create discrepancies. If your school changed its name or merged, ask for a letter on current letterhead that states the historical relationship and confirms that your degree is a valid legacy credential.
Scan Specs
- 300–600 dpi PDF, grayscale or color.
- No shadows, folds, or edge loss.
- Embed OCR for legibility and search.
Issuance Rules
- Registrar-signed and dated.
- Official seal/emboss if required.
- Sent directly by school when possible.
Pro Tips
- Confirm archive address for older cohorts.
- Ask about batch schedules and holidays.
- Keep registrar contact courteous; respond fast.
Build a cleaner USMLE prep system as an IMG
Use MDSteps to organize Step 1, Step 2 CK, Step 3, CCS, weak-area review, and question-based practice without juggling disconnected tools.
Less tool-switching. More targeted practice.
- Practice across Steps 1–3
- Review weak patterns instead of guessing
- Keep CCS included for Step 3
Translations & Notarization: Exactly What “Counts”
If any credential isn’t in English, you’ll need a complete and accurate translation that meets acceptance standards. The safest workflow: choose a qualified translator or translation service familiar with academic/legal documents, ensure they provide a signed statement attesting to accuracy and competence, and keep formatting faithful to the source (including seals, stamps, abbreviations, and marginalia). Avoid “summary translations” that paraphrase only the parts you think matter. If your school issues bilingual diplomas or transcripts, confirm whether the English side is considered the official text; if yes, you may not need a separate translation.
Notarization and apostilles are often misunderstood. A notary typically verifies the identity of the signer (translator or certifying official), not the truth of the content. An apostille certifies the authenticity of a public document for international use between member countries of the Hague Convention. Whether you need an apostille depends on the document type, jurisdiction, and receiving body’s rules. When in doubt, ask the registrar if they can issue an attested copy directly to the destination; this often bypasses the need for separate notarization chains. Keep originals for your records and submit certified copies only through approved channels.
Common rejection triggers include incomplete translator credentials, missing certification statements, mismatched page counts between the source and translation, and failure to translate stamps and seals. Bundle your packet so that the original-language document, the translation, and the translator’s certification appear as a single logical unit. For digital submissions, append the certification page in the same PDF and include a brief cover note describing the contents (“pp.1–3 original; pp.4–6 certified translation; p.7 translator affidavit”). That level of order saves reviewers time and reduces clarifying tickets.
Submission Mechanics: Portals, Filenames, and Evidence Trails
Even perfect documents can stall if you botch the mechanics. Standardize your filenames to carry identity and content in a consistent, human-readable pattern: LAST_FIRST_DOB_YYYYMMDD_DOCUMENTTYPE_VERSION.pdf (e.g., ALVAREZ_JOSE_19970315_DIPLOMA_v2.pdf). Use underscores (not spaces), ISO dates, and clear document types (DIPLOMA, TRANSCRIPT, MSPE, PASSPORT, NAMECHANGE). Keep each PDF under the portal’s size limit and avoid scans of scans—each generation degrades seals and signatures.
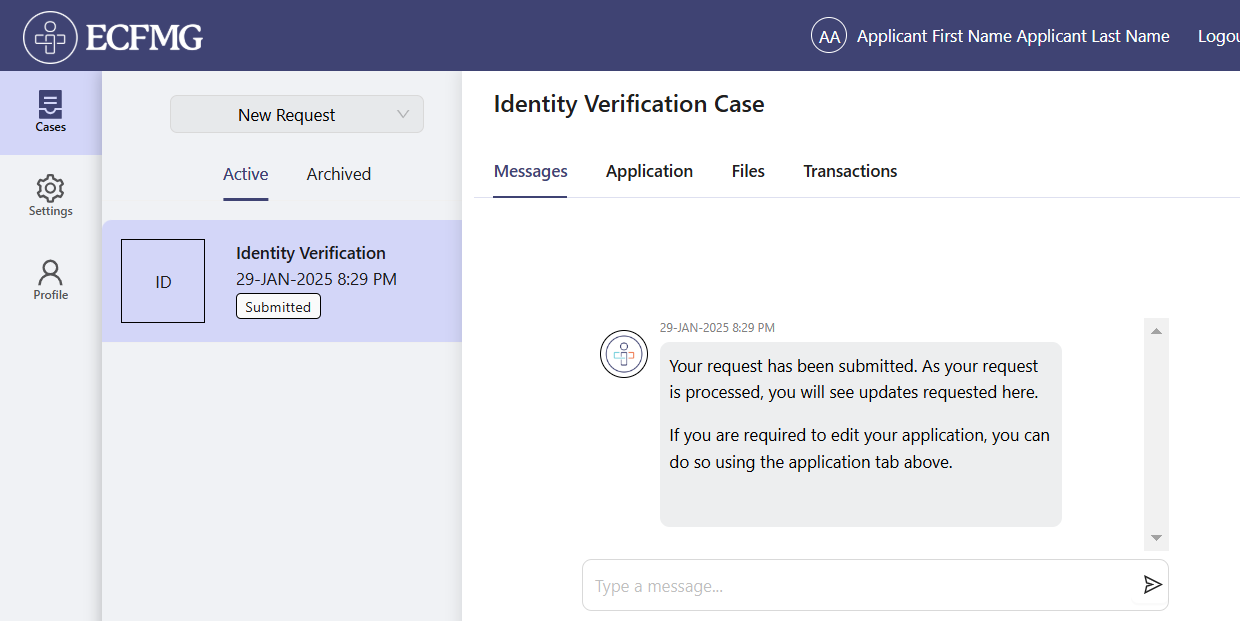
Maintain an evidence trail. For school submissions, send a concise instruction email (or portal message) to the registrar that includes your identifiers, the receiving body, any formal request number, and the deadline. Ask them to reply when sent and, if allowed, to include the transmission confirmation. Save all emails as PDFs and index them in a “Registrar” folder. If you receive a staff ticket requesting clarification, respond in the same thread, attach only the requested items, and summarize changes in one bullet list at the top (“Attached: certified translation, page 3; notarized affidavit linking name variants”). Brevity helps reviewers triage faster.
Finally, practice version discipline. If you correct a name or swap a translation, increment the filename version and keep a change log (date, reason, action). Don’t delete prior versions until the case closes; you may need to reference exactly what was sent and when. If your school uses multiple emails or staff rotate, keep threads short and attach your one-page instruction sheet every time to prevent drift in what they send out.
Attachment Checklist
- Passport bio page (legible MRZ line).
- Diploma + transcript (official source).
- Certified translations + translator affidavit.
- Name change documents (if applicable).
- Cover note summarizing contents.
Email Template (Micro)
Subject: Verification Packet for [Your Full Name, DOB]
Body: Dear Registrar, please send the attached official transcript/diploma to [destination] referencing request [#]. Required: official seal and registrar signature. Preferred by [date]. Thank you.
Special Situations: Transfers, Older Graduates, Clerkship Credits, and Name Changes
Special histories aren’t problematic if you pre-document them. If you transferred between schools, assemble a coherent chain: initial matriculation letter, official transcript from the first school including dates and credits, and the final school’s transcript that shows how those credits were accepted. A short registrar letter stating “Credits from [School A] were accepted towards the MD degree awarded by [School B] on [date]” often prevents follow-up queries. If you completed international clerkships or electives outside your home school’s hospitals, verify how they appear on the official transcript (course codes, sites, dates) and whether an additional letter from the host institution is advisable.
For older graduates, archives and seal formats may have changed. Ask the registrar to confirm whether they issue a contemporary attestation for legacy diplomas and whether the signatory today is different from your graduation year. When your original diploma is damaged, lost, or in a different country, request an official duplicate or a certified copy per school policy rather than improvising your own “certified” scan.
Name changes (marriage, divorce, court order) must be linked via formal documents. Bundle the change order, a government ID showing the updated name, and a brief one-paragraph statement that maps “old name → new name.” If multiple variants exist across documents, add a second paragraph listing the exact document where each variant appears. That explicit mapping reduces the likelihood that staff will ask you to explain subtle differences later.
Finally, if your school rebranded or merged, ask for a letter on current letterhead that states the continuity of accreditation and records custody. It’s a small step that eliminates ambiguity when letterhead logos don’t match your graduation year.
Timeline Engineering: Backward Planning from Your Exam Month
Work backward from the month you intend to sit your exam. Add conservative buffers for school response times (often batch-based), translation lead time, and courier unpredictability. A good heuristic: build a 90–120 day runway for first-time credentialing if any translations or name linkages are involved, and 60–90 days if your documents are already in English and pristine. Use milestone triggers: once the registrar confirms dispatch, schedule a seven-business-day check; if no portal status movement by day 14, open a polite status ticket summarizing what was sent and when.
Keep your study plan flexible by using a “buffer month” before your desired eligibility window. That way, if verification slips, you still hit your peak revision phase without rescheduling fees. Align Q-bank blocks with administrative milestones: do content-heavy phases while you wait for registrar dispatch; switch to high-intensity mixed blocks once your permit is imminent.
| Milestone | Target Lead Time | Owner | Contingency if Slips |
|---|---|---|---|
| Identity Map finalized | −120 to −100 days | You | Prepare name-change affidavit; update portal profile |
| Registrar pre-brief & request sent | −100 to −85 days | You/School | Ask for next batch date; escalate politely at day 10 |
| Translations commissioned | −95 to −80 days | Translator | Use second vendor; request rush with certification |
| Packet dispatched/acknowledged | −80 to −70 days | School | Request tracking or official send confirmation |
| Status check & permit planning | −60 to −45 days | You | Open status ticket with concise chronology |
Near-Miss Matrix: The Most Common Rejection Reasons (and Fixes)
Use this matrix as a preflight scrub before you submit anything. If you can honestly check “no” for every error listed here, you’re positioned for a first-pass approval.
| Document | Error | Why It Fails | Action That Prevents It | Who Sends? |
|---|---|---|---|---|
| Passport | Name variant vs. diploma | Cannot confidently link identity | Match portal to passport; add legal linkage docs | You |
| Diploma | No official seal/signature | Not verifiable as primary-source | Request registrar-issued attested copy | School |
| Transcript | Illegible stamp; missing page | Integrity/ completeness in doubt | 600 dpi rescans; page count verification | School |
| Translation | No certification statement | Translator competence not established | Add signed accuracy affidavit; include credentials | Translator |
| Name Change | Only marriage certificate attached | Doesn’t tie each variant to each document | Include one-paragraph mapping & updated ID | You |
| Submission | Vague filename/metadata | Harder to reconcile during review | Adopt consistent filename schema + cover note | You |
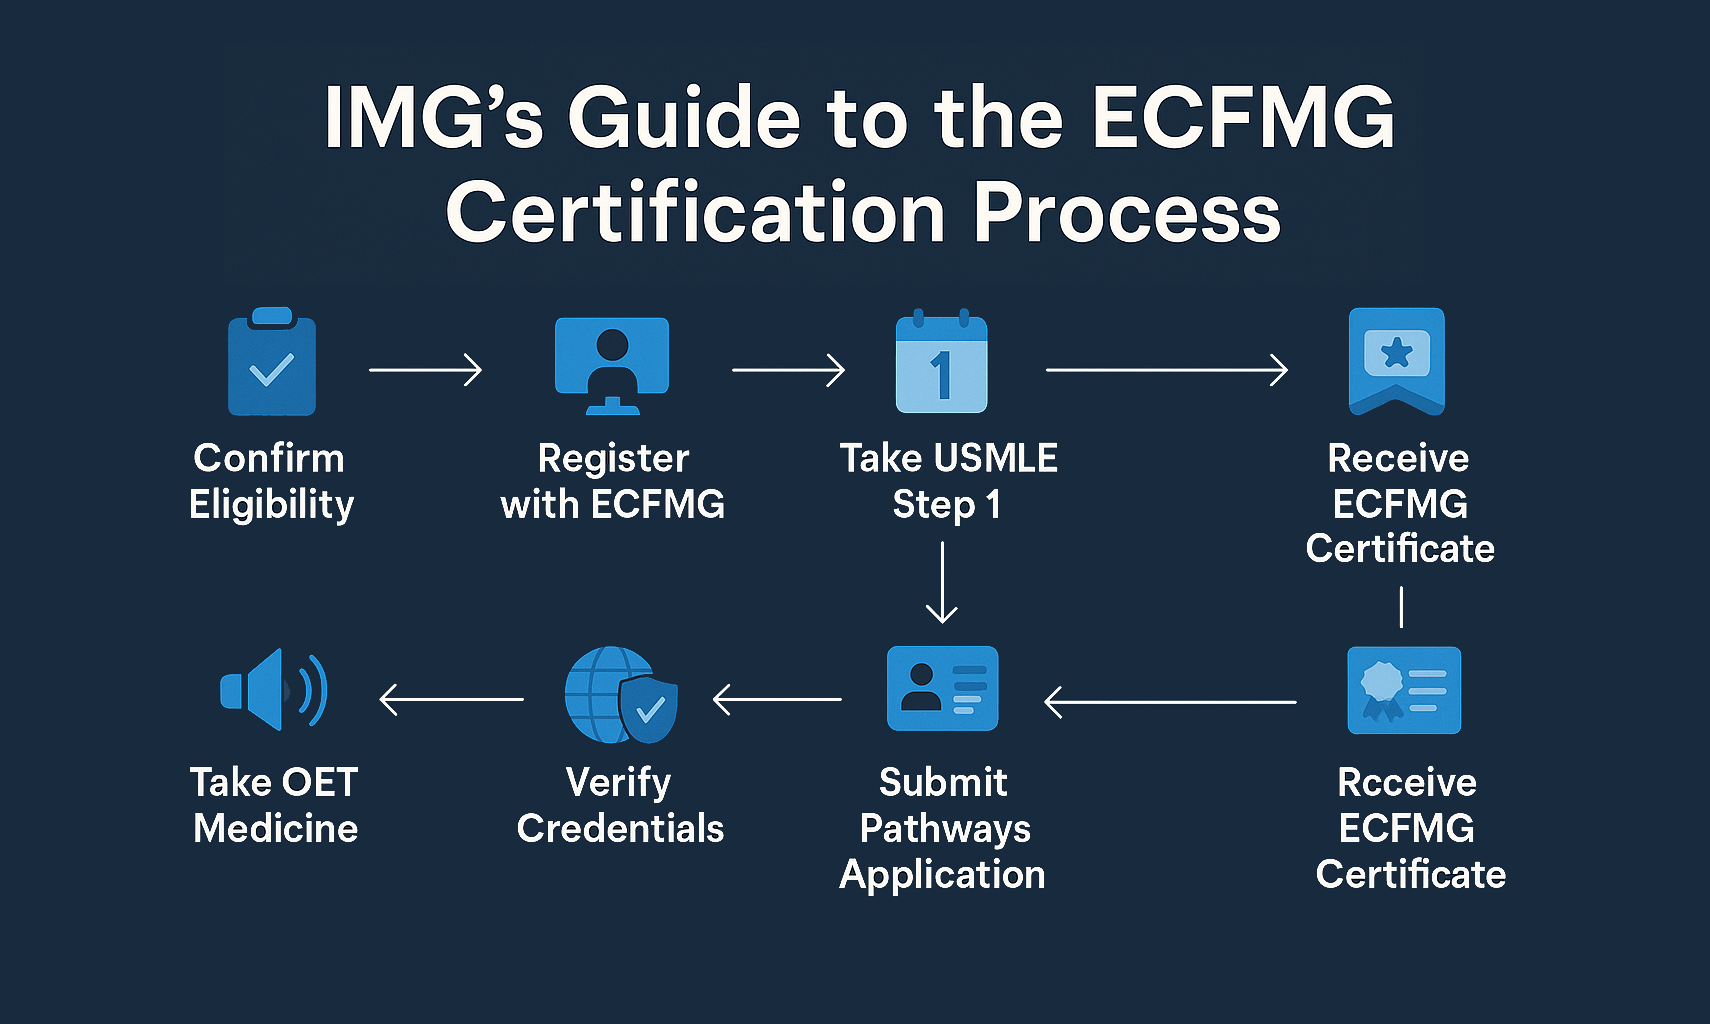
Clean Verification Flow
Rapid-Review Checklist & Exam-Day Essentials
Rapid-Review Checklist (Do This Before You Submit)
- Identity Map: All names mirror passport; variants documented.
- Portal Profile: Legal name, DOB, contact info verified.
- Diploma/Transcript: Registrar-signed, sealed, complete page count.
- Translations: Full, certified, includes seals/stamps and translator affidavit.
- File Hygiene: 300–600 dpi, searchable PDF, standardized filenames.
- Registrar Briefed: Clear instructions, deadline, request number provided.
- Evidence Trail: All requests and confirmations saved as PDFs.
- Timeline Buffers: Status checks scheduled at 7 and 14 business days.
Exam-Day Essentials (When Permit Releases)
- Print/bring your permit exactly as issued (name matches ID).
- Primary ID with same name order and signature.
- Prometric confirmation email + site directions.
- Backup commute plan; arrive 30–45 min early.
- Break plan aligned to your block strategy.
Putting It All Together: A Clean Verification Flow
Think in systems: Identity → Documents → Transmission → Confirmation. Start with your Identity Map and portal profile. Parallel-process registrar requests and translation commissioning so they converge into a single, coherent packet. Use disciplined filenames and cover notes to make the reviewer’s job trivial. Track dates like a project manager, escalate politely when milestones slip, and always provide specific, verifiable facts (what was sent, by whom, and when). With those controls in place, you transform verification from a stressor into a predictable administrative task—leaving your cognitive bandwidth for high-yield question practice and exam-day execution.